Introduction
When you want to publish your Android application in Google Play Store, first you need to go to https://play.google.com/apps/publish/ website and create a Developer account. Its cost is $25. You can read more about that at: https://support.google.com/googleplay/android-developer/answer/113468?hl=en.
Problems with payments during registration
Remember that you need to have appropriate debit card in order to proceed with payments. E.g. I have debit card in PKO BP (Polish bank), which has two-stage authorization. Most of debit cards has two-stage authorization for the registration of the card in on-line payment system and next payments are verified only once. In my bank every payment is verified twice. It’s more secure, but due to this security policy I was not able to pay for my developer account at all! I decided to create another bank account for on-line payments in bank, which has one-stage authorization for regular payments. I’ve chosen mBank (another Polish bank). Finally, I was able to proceed with payments and create my developer account.
Developer Console
When you have your developer account created, you can access Developer Console with your Google credentials. 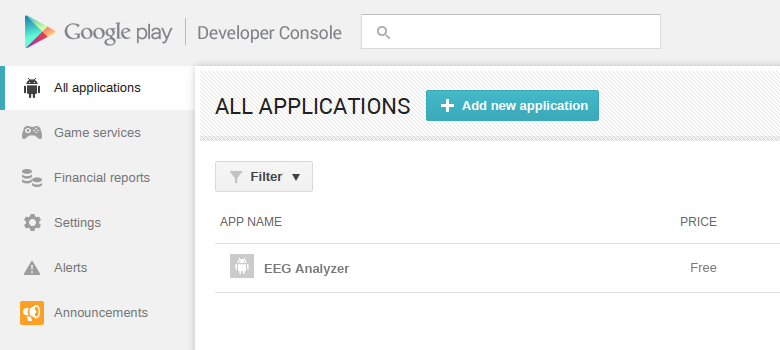 When you create your application, you can choose it from the list of available applications and you can manage several sections.
 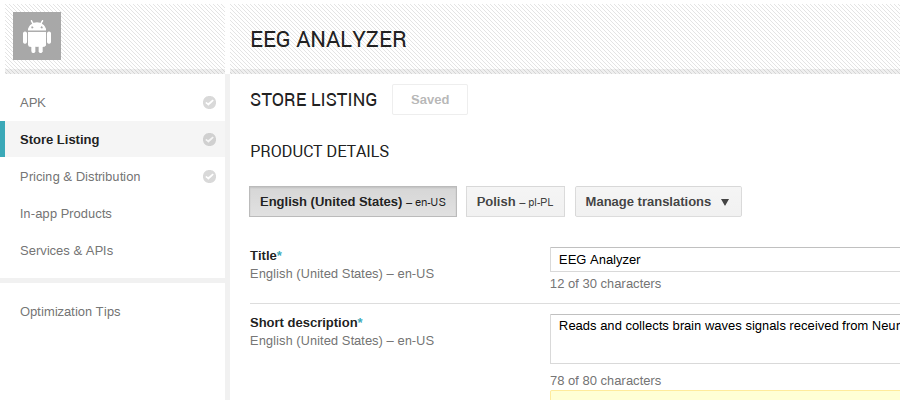 You don’t have to to everything in one session, you can save a “draft” of your application and fill rest of the elements e.g. next day.
APK
Preparing APK file to upload
Before we publish our app in Google Play Store, we need to generate signed *.apk file. In Android Studio, we can choose Generate Signed APK... option from Build menu. 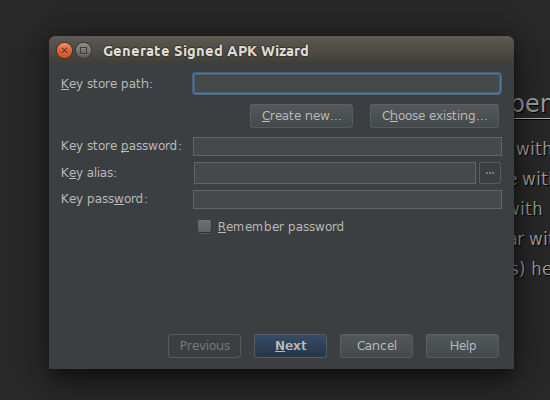 If we don’t have our key store, we need to create one.
 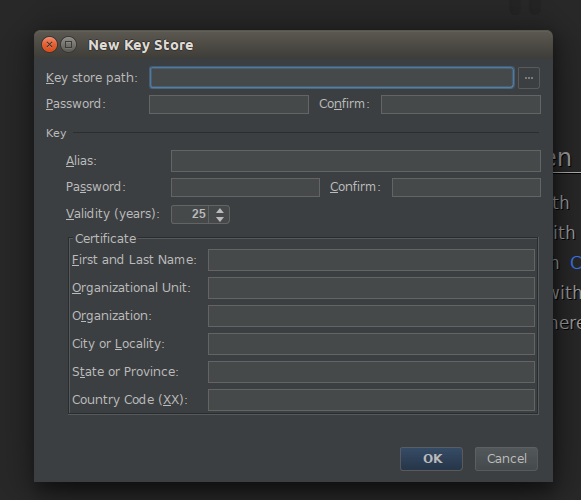 Very important: We need to remember or save somewhere our key store password and alias password (they can be the same). We also need to save somewhere (in a few different places) our key store file. Key store file, key store password and alias password are necessary for signing app. If we want to update uploaded app in the future, we need to sign it with exactly the same key store file and we need to know mentioned passwords to perform sign operation. Passwords can be changed, but we need to know old passwords to do it. When we will sign our app with a different key store file, we won’t be able to update our app after uploading. Next, we need to set master password.
 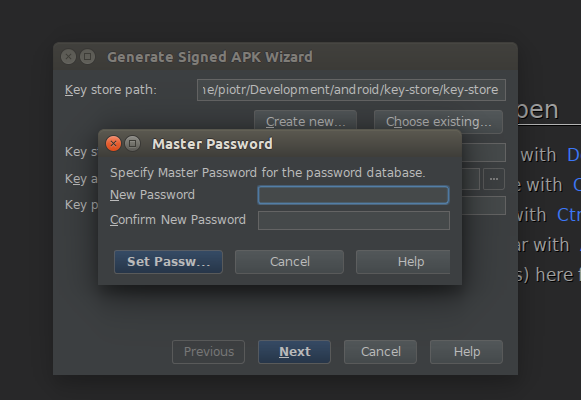 After that, we can click
 Next and finalize generating *.apk file. In this step, we can optionally run ProGuard. 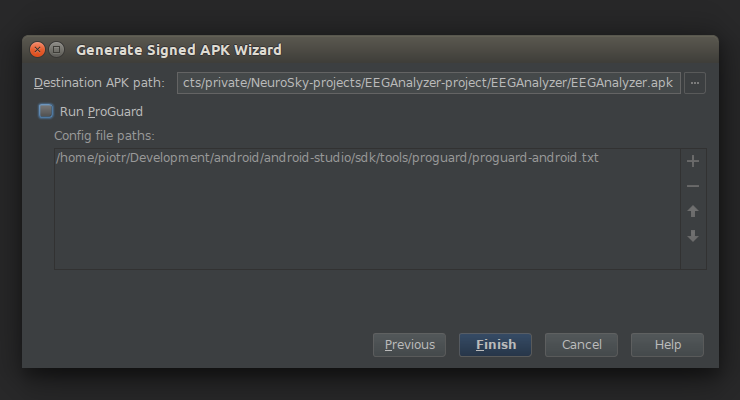 If everything went ok, we should see the following window.
 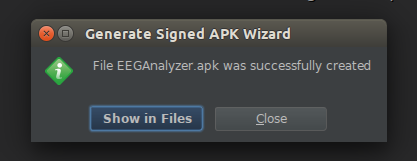 Now, we are ready to upload our
 *.apk file to Google Play Store.
Uploading APK file
In APK section you can upload your application compiled into *.apk file to Google Play Store. 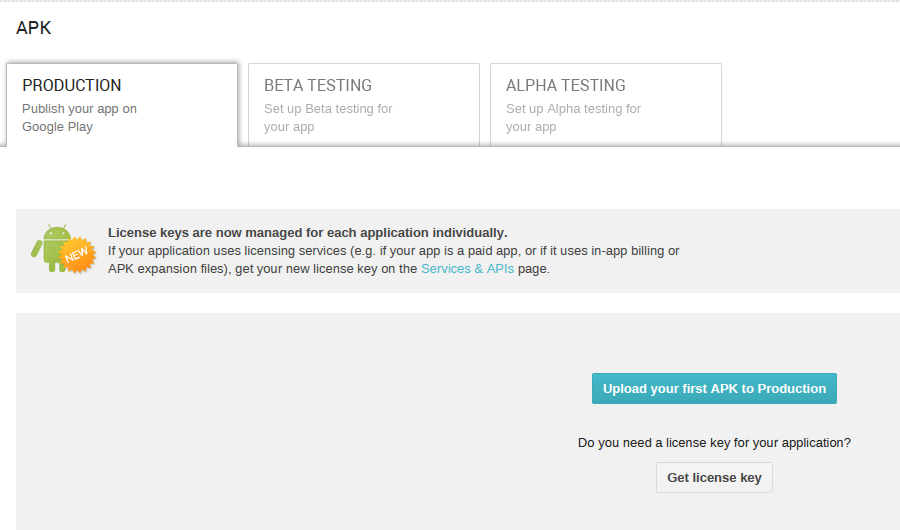 You can also set up Beta testing or Alpha testing and distribute your app to selected group of testers. When, we uploaded our
 *.apk file, application is marked as “Draft”. 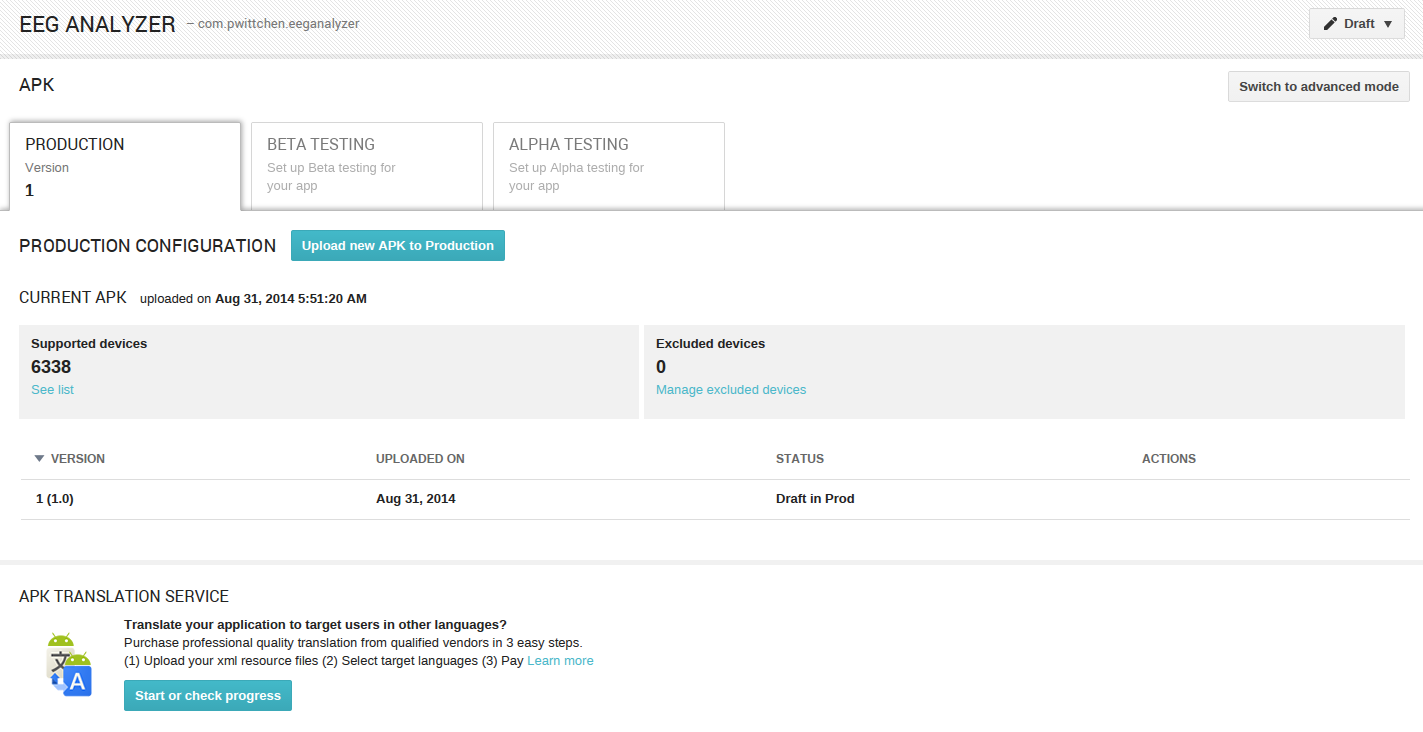 We need to provide all mandatory information in several sections. When, I filled everything, my application was still a “Draft”. I could display message “Why can’t I publish?” and see details.
 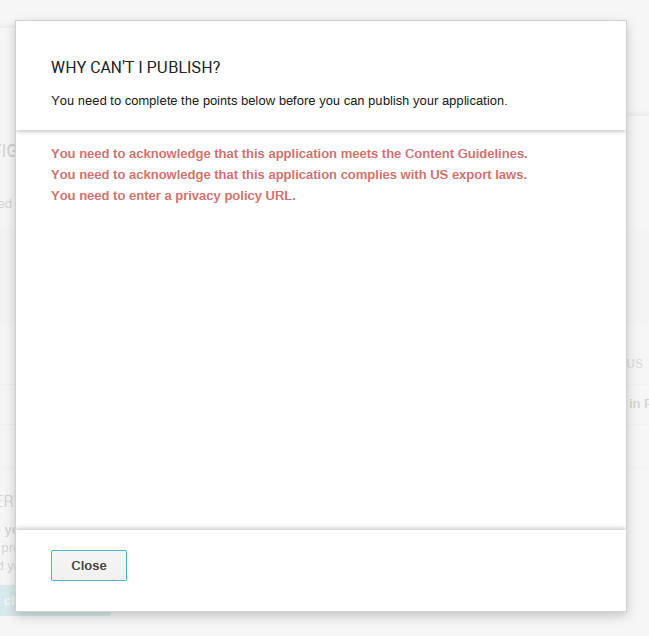 I needed to go to “Pricing and Distribution” section and check mandatory fields.
 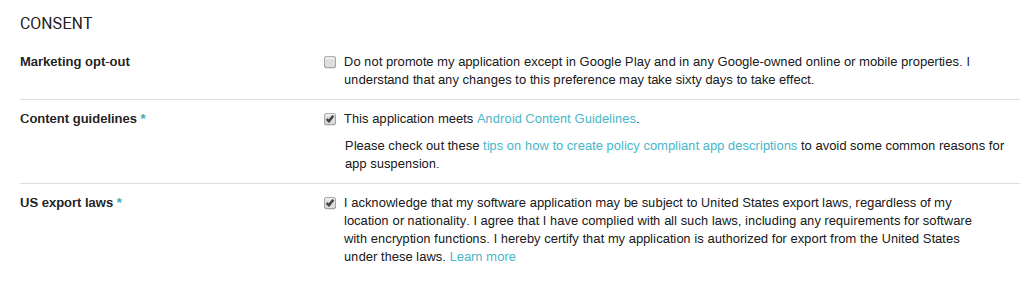 I also needed to mark checkbox Not submitting a privacy policy URL at this time. in “Store Listing” section (“Privacy Policy” subsection).
Store listing
Basic information
In store listing, you need to provide basic information about your app. 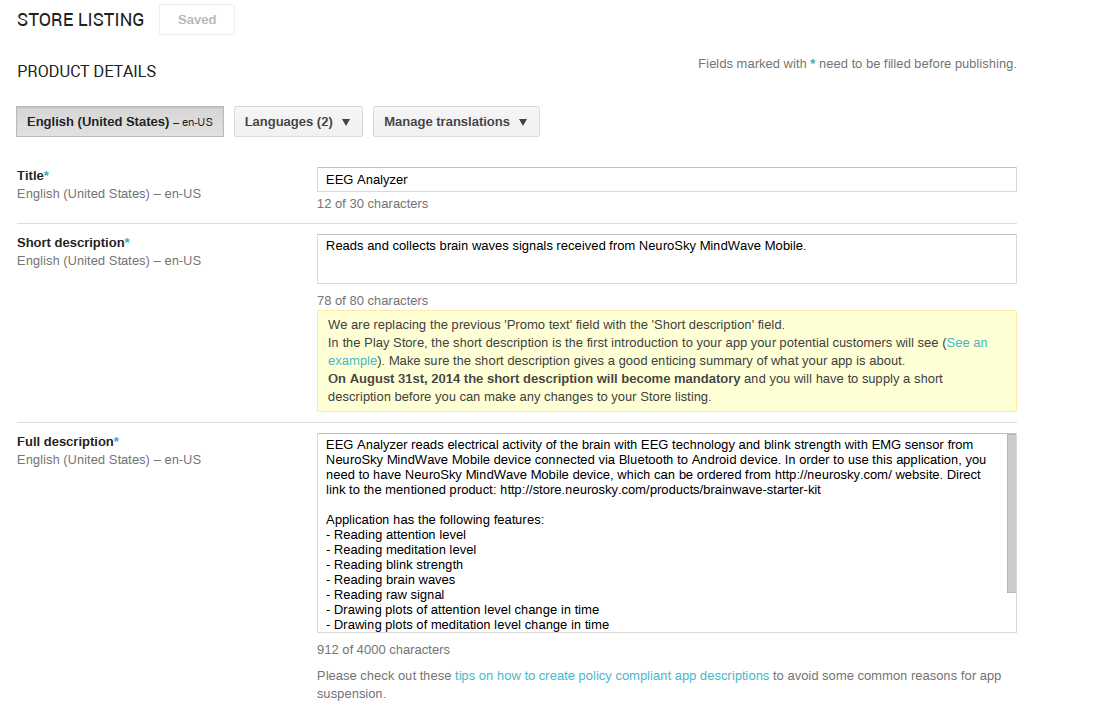
Graphic assets - screenshots
Next, you need to provide screenshots of your app. Screenshots for the phone are necessary, but screenshots for the tablets are optional. 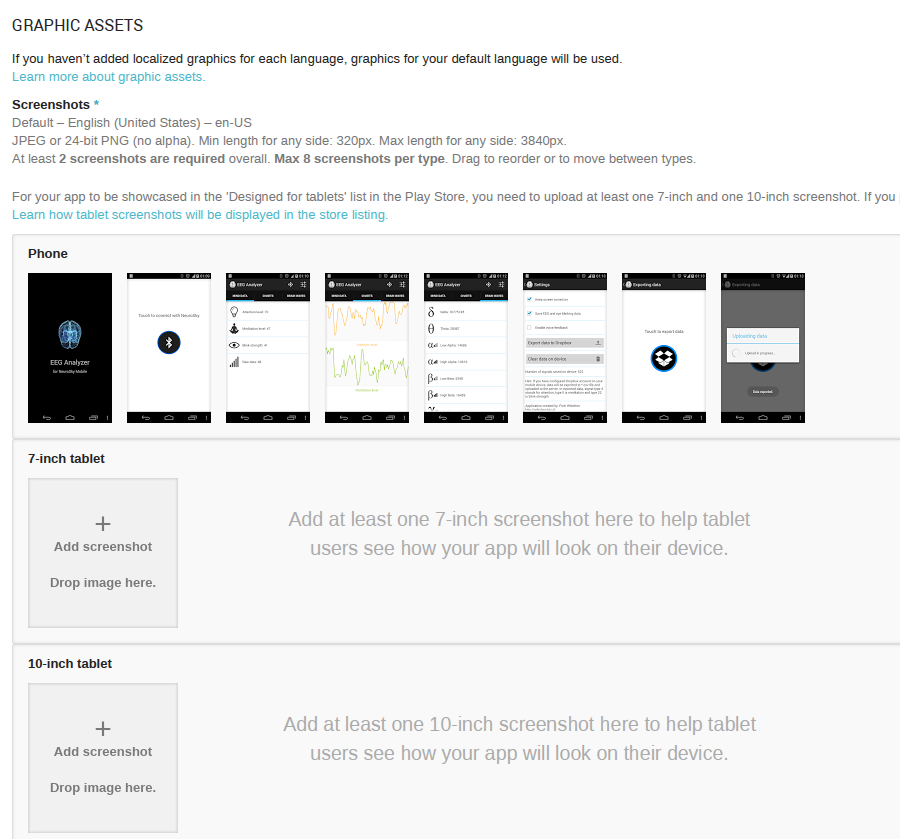
Graphic assets - Hi-res icon, promo images & video
Then, you need to provide promo images & video. Two options are mandatory. 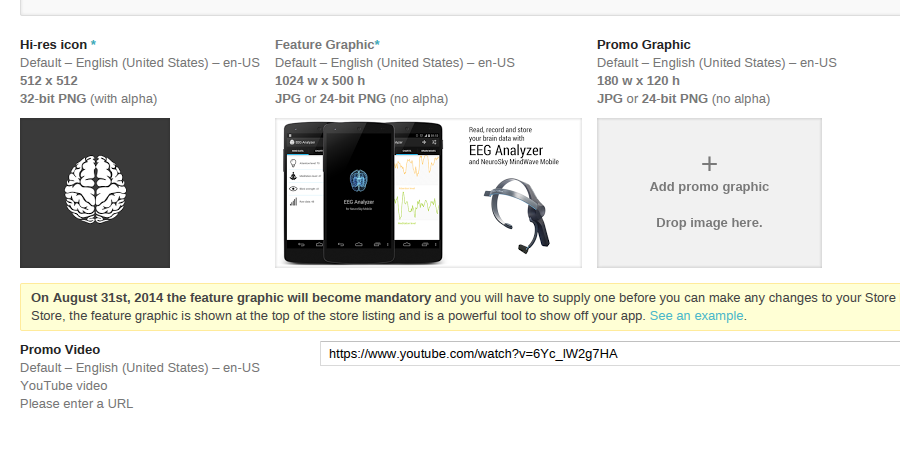
Categorization, Contact Details & Privacy Policy
Next, we can categorize our app, set up Contact Details and Privacy Policy if it’s necessary. If we don’t have Privacy Policy, we need to check the field Not submitting a Privacy Policy URL at this time. 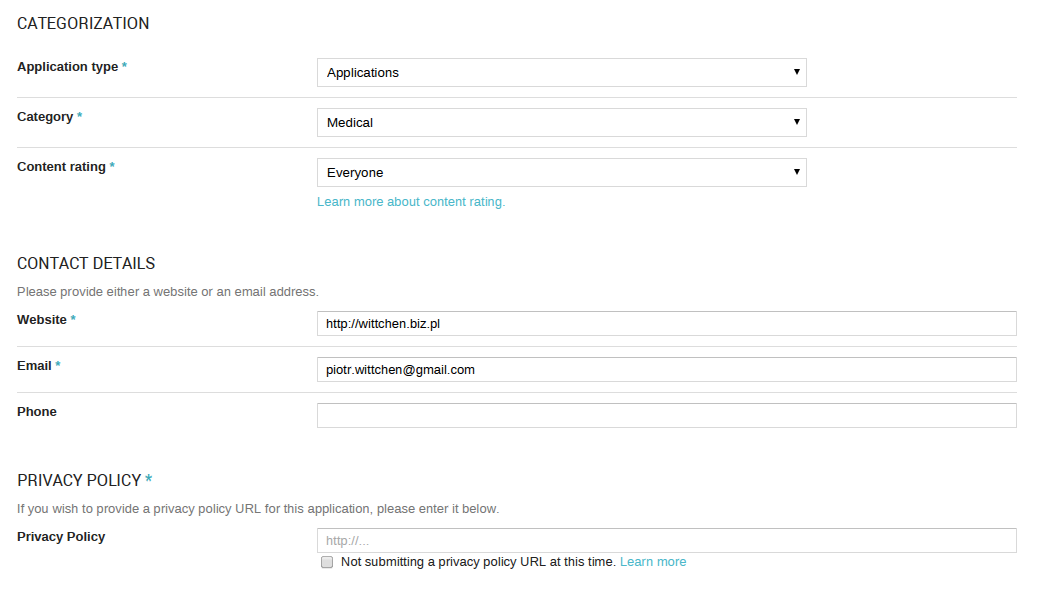
Translations
We can manage translations and prepare different description, application name, screenshot and other details for different languages. In my case, I prepared description and screenshots in Polish and English language versions. 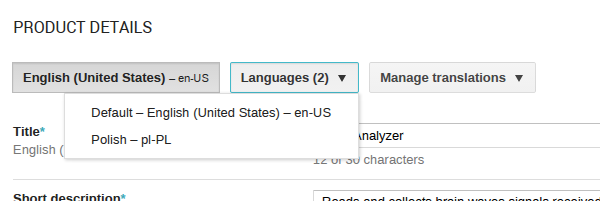
Pricing & Distribution
In this section you can provide information about distribution. You can determine whether your app will be available all-around the world or only in selected countries. You can also determine if it will be free or paid. 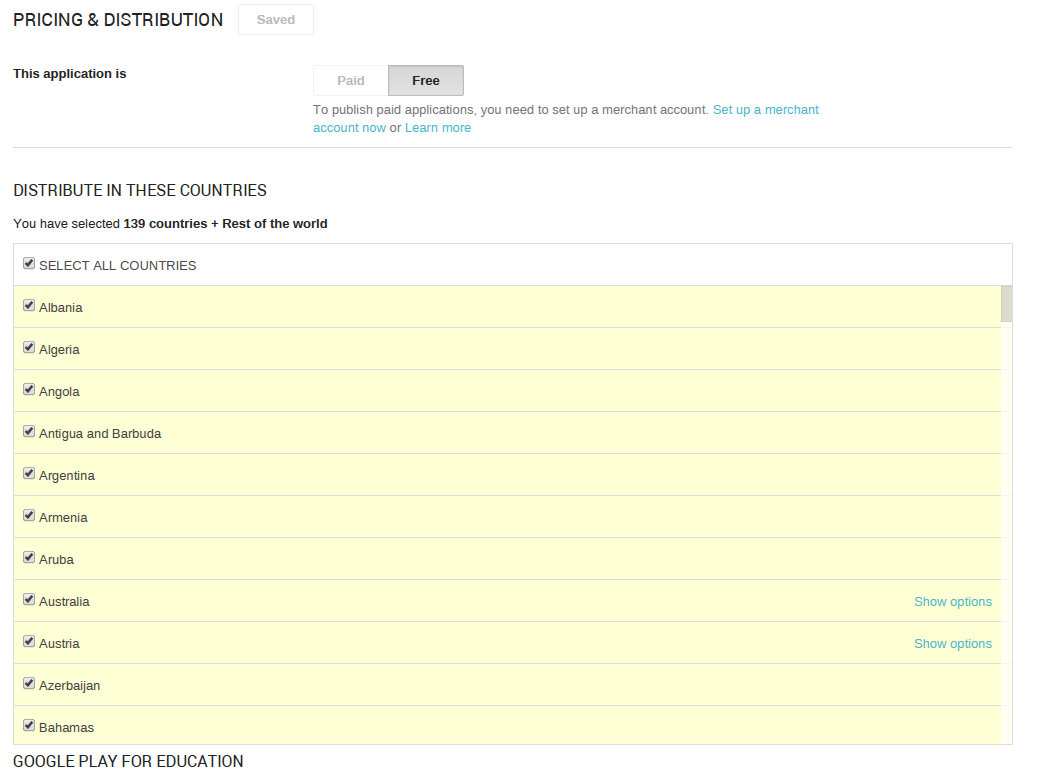
In-app Products
We are able to create in-app products. Application, which I was publishing does not have such feature. You can read more about that at: http://developer.android.com/google/play/billing/api.html
Services and APIs
In this section, you can set up Google Cloud Messaging (GCM), Licensing & In-app billing and Google Play Game Services. Here you can get license keys and link your mobile app with server application if it’s neccessary. There is also feature called App Indexing from Google Search, where you can deep link into your app from Google search.
Optimization tips
Here you can see some optimization tips from Google, which you can apply for your app, to make it better.
Launch checklist
Don’t forget to browse Google’s Lauch Checklist.
Ready to publish
After proving all the information, my application was finally ready to publish! 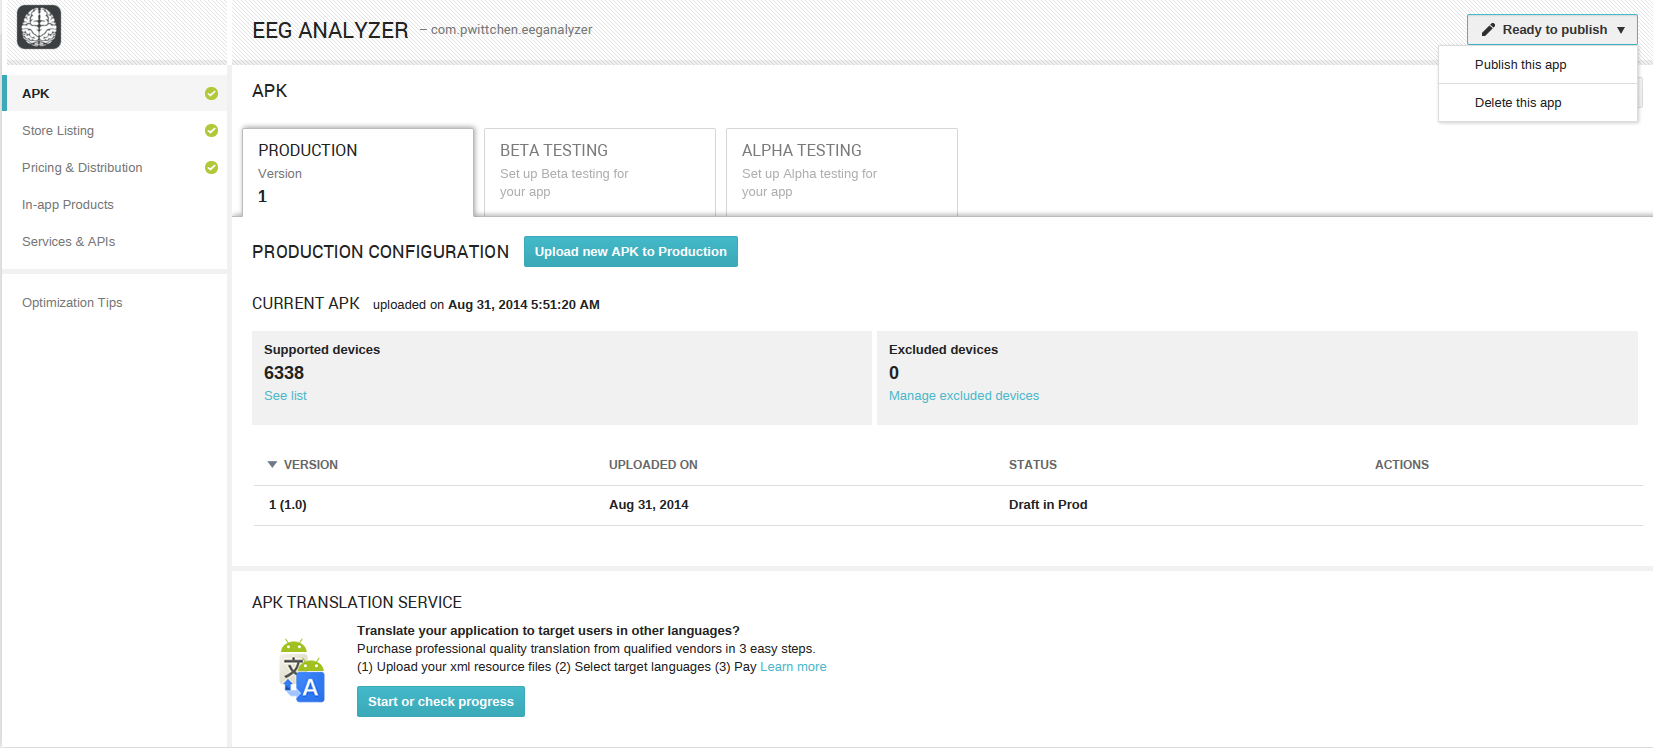 I could click
 Publish this app button and deploy my application to Google Play Store. After that, my application was marked as Published on the list of the applications. It’s worth mentioning that applications are not available on Google Play Store immediately after publishing, but within a few hours. I was informed about that after clicking the Publish this app button. 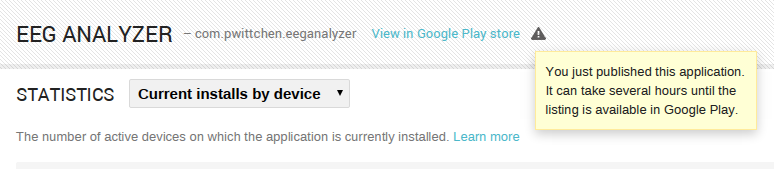 You can see that my app was successfully published. You can download it at: https://play.google.com/store/apps/details?id=com.pwittchen.eeganalyzer. It’s specific application reading brain waves from NeuroSky MindWave Mobile device, so you need to have such device in order to use this app. It can be connected via Bluetooth to the Android smartphone or tablet.
Last words
Information provided in this article does not cover all functionalities and possibilities of Google Play Store. If you want to learn more, please read official Google’s websites.